🎮 1.Introduction:
Hello everyone! In this devlog, i will cover some tips and tricks in game dev (coding, pixel art, music, etc...) I am excited to share my journey and experiences, let's start.
🖌️ 2.learning Pixel Art and discovering tools:
I started my game journey by exploring advanced color techniques. Initially, I struggled with incorporating colors effectively in my games. However, through experimentation and practice, I was able to improve my skills. I would like to give a special shout-out to various YouTube channels that provided valuable tutorials for pixel artists, helping me enhance my understanding of pixel art basics.
Pixel Art Tutorial YouTube Channels:
Saultoons
Pixel Overload
Reece Geofroy
And For Tutorial AND inspirations:
AdamCYounis
Some Pixel art tips:
1.be inspired.
2.NEVER EVER delete your pixel drawing, you will need it later.
3.pick up your image resolution before drawing it.
4.every sprite in your game must be in the same style, like your player is outlined and the house beside the player has to be outlined.
5.choose the perfect palette to make your colors organized.
6.always have reference for your drawing, like if you are drawing cow look for cow image.
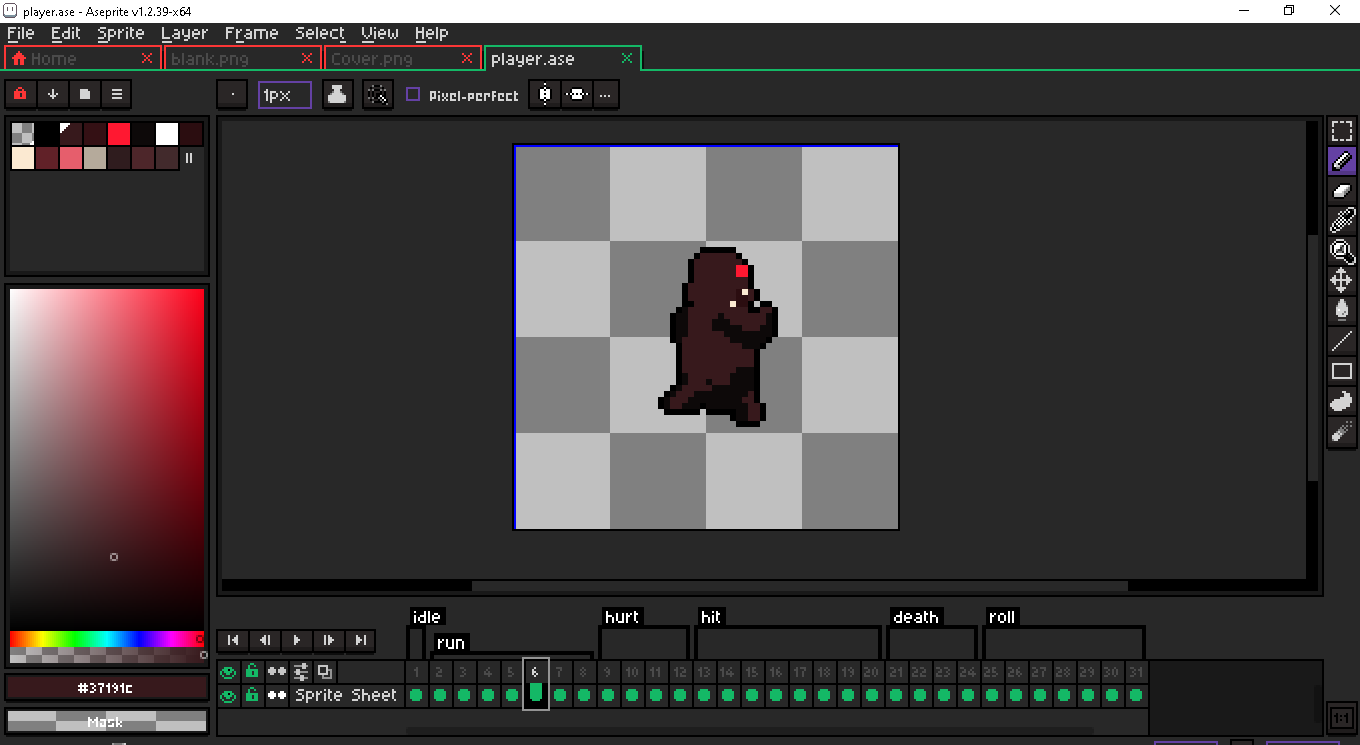
As a pixel artist, finding the right tools can make a significant difference in the quality of your artwork. While I primarily used Aseprite for drawing pixel art, I understand that it may not be accessible to everyone due to its cost. Therefore, I would like to suggest another free pixel art Alternative tool:
GraphicsGale
it doesn't matter the tool That is used it can even draw in MS Paint but the important thing is to know how to use it.
💻 3.Learning to Code:
This game jam was an opportunity for me to delve into game development and coding. Although I had prior experience coding in the LOVE2D framework, this was my first time creating a top-down game and working with pixel art and animations. Moreover, I decided to challenge myself by learning Godot, a popular open-source game engine. While I followed tutorials initially, this game was my first attempt at creating a game without relying on step-by-step guidance.
Recommended people for Godot:
GDquest
HeartBeast
KidsCanCode website
Kenney website
and this is some useful videos in game dev:
https://kenney.nl/learn/must-see-videos-for-indie-developers
Extra Tip: learn something you need it like if you watched a random tutorial and didn't made a something as a practice or test you will forget it.
🧃 4.Game Juicing: Enhancing the Game Experience:
To make my game more engaging and enjoyable, I focused on "juicing" it up. This involved adding sounds, shaders, animations, and other elements to enhance the overall experience. Game juicing is an essential aspect of game development, as it helps captivate players and adds polish to the final product. everywhere that feels immersive and exciting, this part is considered as juiceness.
🪑 5.What About Break(Rest)?:
Taking regular breaks and allowing oneself to rest is crucial in boosting learning and productivity. But this doesn’t mean to take a break every 5 minutes, incorporating breaks of around 80-120 minutes can significantly improve focus and learning. During these breaks, engaging in activities you enjoy or even walk around with no reason also can recharge your energy and help you learn better.
🛠️ 6.Tools and Resources Used:
In the development of my game, I utilized several tools and resources that contributed to its creation:
Aseprite: A powerful pixel art tool. (https://www.aseprite.org)
Godot: An excellent open-source game engine that facilitated the development process.(https://godotengine.org)
Storyblocks.com: A source for background music that added depth and ambiance to my game. (https://www.storyblocks.com)
BFXR: A tool for creating retro or arcade-style sound effects that complemented the overall aesthetic. (https://www.bfxr.net)
🔍💢 7.The Significance of Testing and Problem-Solving:
Testing is a critical phase in game development. It involves meticulously examining every aspect of the game to ensure it functions as expected. If any issues arise, it is essential to seek help from others or consult forums specific to the game engine you're working with. Finding solutions to problems and sharing them with others who may encounter similar challenges is a valuable way to contribute to the game development community.
💼 8.My Journey:
The most challenging part in this game was, using Godot in category like this and making it in 10 days and making dialog was a bit challenging for me.
And the most interesting part in this game was, juicing the game, after I felt the game is dry I followed juicing tips like making camera shake, time freezing, and noise, shaders and enemy weapon like:recoil, flash, light. And explosions was made too smooth because I used particles and didn’t draw it (will take long time to make it ~60fps).
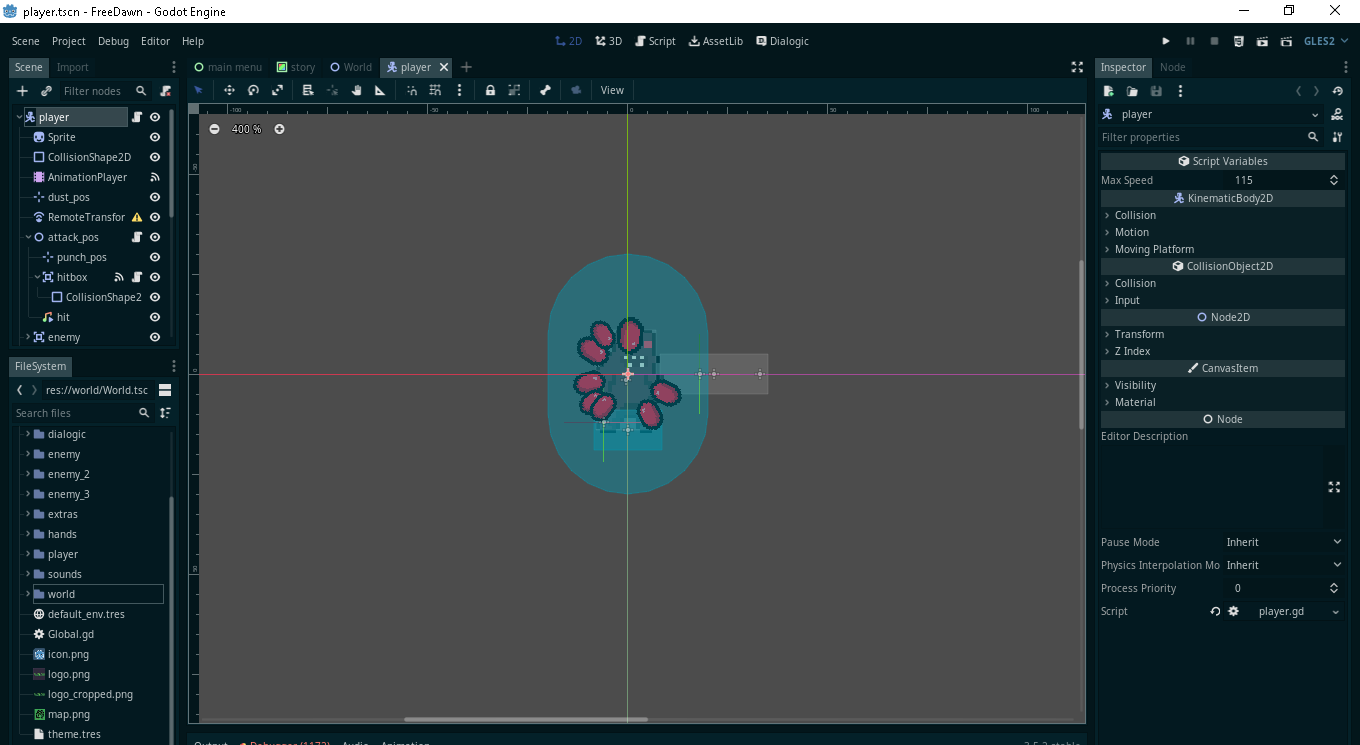
1.player:
---------------
making the player is hard a little bit like handling all this events
i used all this nodes for my player, one for collision, another to display sprite, hitbox and hurtbox, and hand, and etc...
*movement* was the easiest part in player code.
```
# here we are getting the strength of key and its opposite and then minus them to get the active key
input_vector.x = Input.get_action_strength("right") - Input.get_action_strength("left")
input_vector.y = Input.get_action_strength("down") - Input.get_action_strength("up")
input_vector = input_vector.normalized()
velocity = move_and_slide(velocity)
```
i wasn't able to manage states so i made it as states in enum like this:
```
enum {IDLE, RUN, ROLL, DIED, RESET}
var STATE = IDLE
match STATE:
IDLE:
velocity = velocity.move_toward(Vector2.ZERO, friction * delta)
$AnimationPlayer.play("idle")
RUN:
velocity = velocity.move_toward(input_vector * max_speed, acceleration * delta)
if not rolling:
$AnimationPlayer.play("run")
if Input.is_action_just_pressed("roll") and not rolling and can_roll:
roll()
ROLL:
roll()
DIED:
$AnimationPlayer.play("death")
$hurtbox/CollisionShape2D.set_deferred("disabled", true)
max_speed = 0
velocity = velocity.move_toward(Vector2.ZERO, friction * delta)
```
the state works like this image:
if i pressed the key go to run, and if i released it go to idle(stop) and if the health is than 0 go died
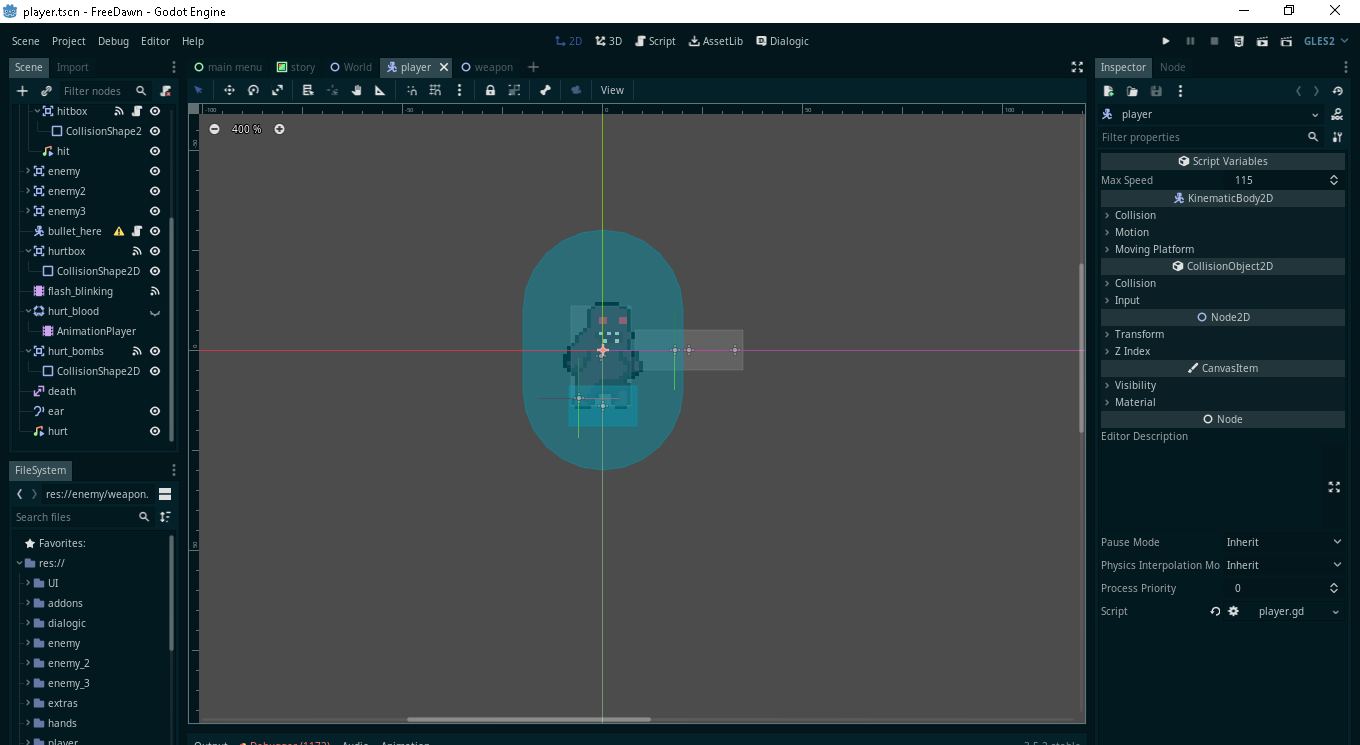
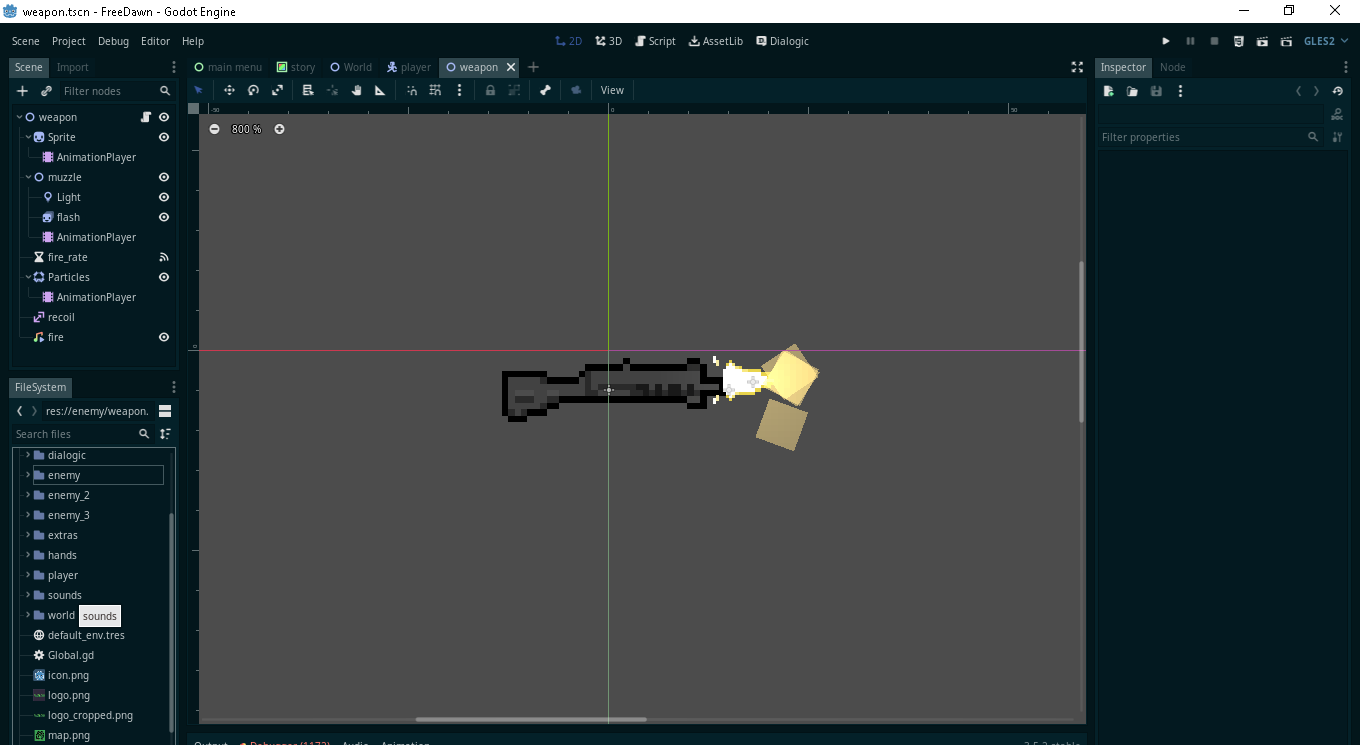
2.enemy:
here are the enemy weapon nodes:
every enemy has its own ability but the AI of movement is one this code is example:
```
var player = get_parent().get_node("player")
var player_pos = player.position - position
motion = motion.move_toward(player_pos.normalized() * speed, 200 * delta)
```
`move_toward()` is used to move to something
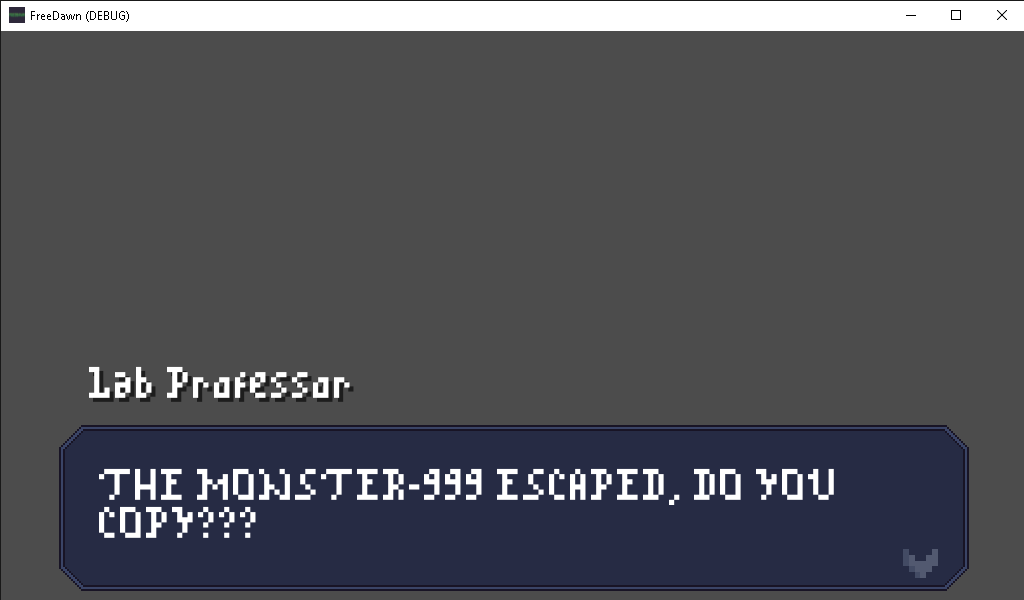
3.Dialog:
and this is a new thing i learned is to make dialogs for characters:
this also was a little challenging section, I also used some radio expressions here are them:
Roger that = “Message received and understood”
Do you copy? = “Do you hear me or received the message”
Approaching the monster = “we are getting closer or in his area”
4.Extras:
1.some people asked me how i made the trees sway, and From extras is tree swaying, I applied this code as shader to make my trees sway 🌳:
```
// original wind shader from https://github.com/Maujoe/godot-simple-wind-shader-2d/tree/master/assets/maujoe.simple_wind_shader_2d
// original script modified by HungryProton so that the assets are moving differently : https://pastebin.com/VL3AfV8D
//
// speed - The speed of the wind movement.
// minStrength - The minimal strength of the wind movement.
// maxStrength - The maximal strength of the wind movement.
// strengthScale - Scalefactor for the wind strength.
// interval - The time between minimal and maximal strength changes.
// detail - The detail (number of waves) of the wind movement.
// distortion - The strength of geometry distortion.
// heightOffset - The height where the wind begins to move. By default 0.0.
shader_type canvas_item;
render_mode blend_mix;
// Wind settings.
uniform float speed = 1.0;
uniform float minStrength : hint_range(0.0, 1.0) = 0.05;
uniform float maxStrength : hint_range(0.0, 1.0) = 0.01;
uniform float strengthScale = 100.0;
uniform float interval = 3.5;
uniform float detail = 1.0;
uniform float distortion : hint_range(0.0, 1.0);
uniform float heightOffset : hint_range(0.0, 1.0);
// With the offset value, you can if you want different moves for each asset. Just put a random value (1, 2, 3) in the editor. Don't forget to mark the material as unique if you use this
uniform float offset = 0;
float getWind(vec2 vertex, vec2 uv, float time){
float diff = pow(maxStrength - minStrength, 2.0);
float strength = clamp(minStrength + diff + sin(time / interval) * diff, minStrength, maxStrength) * strengthScale;
float wind = (sin(time) + cos(time * detail)) * strength * max(0.0, (1.0-uv.y) - heightOffset);
return wind;
}
void vertex() {
vec4 pos = WORLD_MATRIX * vec4(0.0, 0.0, 0.0, 1.0);
float time = TIME * speed + offset;
//float time = TIME * speed + pos.x * pos.y ; not working when moving...
VERTEX.x += getWind(VERTEX.xy, UV, time);
}
```
2.enemies here was too hard so.. After long thinking session and after the enemies aim was like aimbot I made the enemy attack or shoot player last position every 1 sec by making a node that follow the player and the enemies follow this node so the player has to be fast.
3.adding recoil is one of the weapon juice tip, and the recoil of gun means the amount of its force that bounce it back, i added the enemy gun recoil by adding the node tween in godot and then added this code:
```
func recoil():
$recoil.interpolate_property($Sprite, "position", Vector2(recoil_amount, 0), Vector2(0,0), 0.2, Tween.TRANS_LINEAR, Tween.EASE_IN_OUT)
$recoil.start()
```
and then added `Recoil()` every time the timer of the weapon ends.
📝 9.My Plans:
for sure implementing systems in the game to be more fun to play may be good thing, but.. it is not that easy it needs plans to follow to prevent getting lost in the project(game)😕😕.
sooooooo... i added plans:
1: we need player, add to the list player and this player need art and code and extras.
2: we need enemies, our game is nothing without the enemies, add enemy to the list and his weapon is a gun and the another enemy need hands and the last one have grenade launcher to shoot bombs, now we need to draw them, and code their systems like: movement, aim, attack, etc.
3: we have to draw the environment(world), first the trees, we have to find the right style for them and then draw the tree, and the background of the game during playing which was parallax.
4: we have the Ui the word ui refers to User Interface, which may be buttons, text and bars
so.. make your plans with the way you like that makes you understand what will you make, even after years from forgetting it, and this is my plans:
and after i finish anything(a point) in the game i draw "X" on it that means Checked or Done.
📅 now i will show you a fast timeline for creating this game and what i made in them(9 days):
1st Day:
i was thinking about the story of the game and the characters and the environment of the game.
2nd Day:
i started drawing all my characters and environment and become satisfied with their art and animations.
3rd Day:
i entered godot the game engine and created and code my player to move, attack, roll and etc.., and creating the first type of the enemy who is shooting with the gun.
4th Day:
i was coding the 2 remaining enemies the first one with his hand he punch the player and the second had a grenade launcher that for sure shoot a grenades that explodes after amount of time.
5th Day:
i was making the real world of the game instead of the grey color, placing the parallax background and the grass and trees, and because i finished this work early than i expected i made the systems of the game like: the health of our player and enemies health and attack damage.
6th Day:
just one sentence: juice every single place, like adding shaders and the weapons and squash, stretch and more other.
7th Day:
i created the game UI(User Interface) like: the main menu, health bar, buttons
8th Day:
was testing, the testing process or debug the project may not be easy and some of my friends helped me in this process and i asked in the forums but not everyone is waiting for me to post my problem, so my tip is to not test your game in the before last day or the last.
9th Day:
i exported my game and published it to itch.io and submitting it to the jam and creating the game cover, and collecting gameplay screenshots.
and this devlog was written day by day.
Conclusion:
I didn’t focus only on making a awesome game but I focused on learning something new, I hope this devlog has provided you with valuable insights into my journey, the resources I utilized, and the lessons I learned. Thank you for joining me on this adventure!
And for sure learning comes from practice.
Disclaimer: I tried to make this devlog short and valuable with knowledge about game dev and make sure it covered my full journey.
-GhosX


Comments
Post a Comment